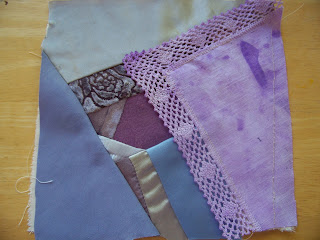
So - basic CQ construction. First, I have to say that the main rule of crazy quilting is that there are NO RULES, so my way is just one of many. You can search on the internet for different ways to piece if mine doesn't work well for you.
Second - I learned this method of piecing from a video by Judith Baker Montano. She is a long-time CQ artist, originally from Alberta and now living in the US. She has written some excellent books, and her website is judithbakermontano.com
For this example, I will be making a 6 1/2" square, which, when sewn to another square or stitched down onto a tote bag, will finish to 6" square. I begin with a 7" square of muslin, to allow for "shrinkage" as I stitch down the fabrics on top. I used to make my base square several inches bigger on all sides, but that meant I'd end up trimming away and wasting too much fabric. 1/4 - 1/2" all around is all you need. If you don't have muslin, an old white or ivory sheet or pillowcase would work. Cotton is preferable, as polyester in the base fabric is a little rougher, and can shred your embroidery thread later. If you have ever done any kind of quilting, you'll know that you only use a 1/4" seam allowance (garment sewing is usually 5/8"). One quarter inch is about the width of your sewing machine's presser foot, which is kind of a nice coincidence, now isn't it?
The first piece of fabric is 5-sided, like a lopsided house. I place it slightly off-center on the muslin, right side up.
Sorry about the blurry photo.......
I pin the next piece of fabric, right sides together, along any of the sides of the pentagon.
I stitch down the second fabric, using a slightly longer stitch length than normal. Notice I do not backspace or lockstitch at the beginning and end of the seams. Often you need to clip a few stitches later, when trimming fabrics. The longer stitch length and no backstitching makes it easy to lift up the fabric and nip the stitches where necessary.
Next, I trim away excess seam allowance to prevent bulkiness when hand-stitching later. I press the seam, first pressing just as I've sewn it, then flipping the second piece over, and pressing well. You want to keep the piecing as flat as possible at all times. The iron is your friend!
I like to work counter-clockwise in my piecing. You can work either direction, just pick one direction and consistently go that way to prevent awkward L shapes and other piecing problems. Here I have turned the piece and pinned on a third piece of fabric, right sides together.
But sometimes the seams can get a little long, and I don't it to look bigger and bigger as it extends to the edges. So, piece two or more fabrics together and use them as a unit for the next addition to the block.
Basically you continue piecing until you have completely covered and slightly overlapped the edges of the muslin.


No comments:
Post a Comment