Encrusted CQ class project

Encrusted CQ class project

Thursday 27 March 2014

My Father, My Daughter and Me

This fall I asked my Dad and brother to make me one of these:

A point presser/clapper is an important pressing tool, to help ensure crisp collar points and perfectly pressed seams.  They are made of unfinished hardwood, so the steam from the iron penetrates deep into the fabric. Beautiful pressing can take a sewing project from so-so to professional looking. Since I want one of these for my sewing room, and my Dad does beautiful woodworking, I asked him to make me one. Dad and my brother spend time to together every Tuesday evening, doing various wood and metalwork projects in Dad's shop.  Also my Dad has been battling multiple cancers for several years, and the thought of having something he made for me that I will handle every day in my shop for many years......you understand.

I will be receiving my clapper in the mail soon, and my Dad emailed me to tell me that it was nearly done.  He also told me the history of the wood he used, how it came from a desk used in the old Nanaimo post office (which was replaced by the new post office in the 1960's).  So the wood is over 100 years old.  I get a tool made by my Dad's hands, and a piece of Nanaimo history all at once.  How amazing is that?!

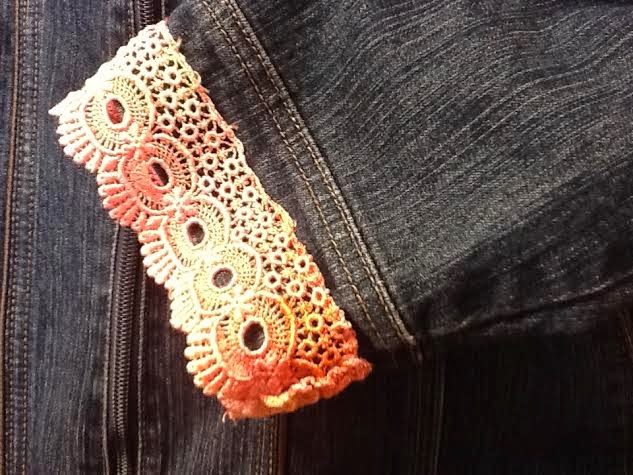
A day or so after receiving the email, I thought about how my Dad wanted me to know the story of the wood he used.  I completely understand this, as I remember when and I where I bought all of the pieces of fabric, buttons, and trims I use in sewing projects.  Especially when the materials are from old garments or vintage finds from a thrift store, the provenance of the materials is important to me.  Their story becomes part of the garment's story.

My birthday was this week, and my daughter brought me a wreath and a pen holder that she made for my sewing room:


She told me the story of how she designed and made them, the design problems along the way, and how she solved those problems.  So, I was given a second gift - not just the objects, but also the stories behind them. 

My Dad, me, my kids.  We understand that the craftsman has a story to tell, and whether it's a designer dress or the wooden tool that helped in the making of the dress; the craftsman's story is a part of what makes it beautiful. 

Wednesday 26 March 2014

Organizing my Fabric Stash

I don't know about you, but I seem to have to reorganize my fabric about every 6 months.  When I have too much fabric squeezed into one storage space; and I'm pulling and auditioning fabrics for a new project; well, that's a recipe for disaster.  And we won't mention the fact that I don't clean up after these forays into the fabric dresser.  :-/

Today, I did a reorganize of my fabric, it took less than an hour, and I think this system is actually going to work for me.

After coming home from college, with lots of scraps of fabric, and a bunch of free fabric, I knew I had to sort through and pare down what I had.  We all love fabric, but we are only going to use so much.  Fabric is meant to be used, not hoarded in a closet or garage.  It goes out of style and deteriorates with sunlight, humidity and heat.  I needed to get honest about what I was realistically going to use in the next 18 months.  I figured if I hadn't used it in 18 months, I probably wasn't going to.  Quite a bit of fabric went to our local thrift store, but most of it was in less-than-1-meter pieces.  Hopefully a crafter or quilter bought it and is putting it to use.

After Christmas, I put my larger pieces of fabric on cardboard bolts, which until today were leaning against a wall in the studio. The smaller bits got stuffed into my fabric dresser, a well-loved 4 drawer dresser.  But things were still in a mess, and the bolts of fabric were in direct sunlight.

Today's solution:  All the bolts of fabric got put into a bedroom closet, protected from sunlight, which can rot and fade fabric.  Everything else was pulled out of the dresser, sorted into categories, repacked neatly and the drawers were labelled.  My categories were knits, silk scraps, garments for upcycling and Christmas.  All the other fabrics were sorted by color - blues/greens, red/pinks/purple, black/brown/silver, white/ivory.  Multiple categories went into each drawer, and the dresser is now roomy and organized.  No, that doesn't mean I can go buy more stuff!  Sorting my sewing supplies always reminds me of my good intentions to make garments, and I realize how many projects I already have on the go or in the planning stages.  I've got a gracious plenty - not a gross excess, just enough to keep me busy for the time being.

Not bad for less than an hour's work!


Friday 21 March 2014

Crafts and sewing on the Internet

After a few days of busy-ness, getting things ready to open my business, I took Saturday as a "play day".  I'm creating a few quick and easy projects, while watching Youtube videos for further inspiration.  I thought you might be interested in some of the Youtube channels I watch, for sewing ideas and techniques.


This is a link to a youtube video on making shabby chic fabric flowers.  Now I want to make these in cotton, cheesecloth, burlap....all tea-dyed and lovely....sigh....
http://www.youtube.com/watch?v=DNnYMpqo2vw


Debbie Shore has lots of videos on sewing, including this tour of her sewing room.
http://www.youtube.com/watch?v=y4xtvZ2IHW4


Niler Taylor's YouTube channel has lots of great sewing videos.  I really enjoyed this video, on pricing your sewing and craft items for sale.

http://www.youtube.com/watch?v=h6Df-IW_CJY&list=LLBSJlNRoOx1qU3MaG5sDEsQ


And finally, a link to a video from Nancy Zieman of Nancy's Notions.  She's been in business a long time, and she's the best.  This one's about layout and cutting of sewing patterns.

http://www.nancysnotions.com/category/video+demos/successful+pattern+layout.do?extid=140308&code=141337-5700


Happy Sewing and Crafting!

Thursday 20 March 2014

Blog Giveaway - We Have A Winner!

The winner of the pink crazy quilt panel is.....Susan H! Susan, I will private message you for your mailing address, and this beauty will be on it's way to you!

Thank you everyone, for entering.  I plan more giveaways in the coming months, because this was so fun!

As I was deconstructing a pink satin blouse today, I found a tiny "spare" button in the side seam.  It looked so cute, hiding in that seam allowance, that I had to take a picture.  It's a pink shell button, and well, it just made me smile.

Enjoy the first day of spring, and hope you are not watching snow fall, like SOME OF US are :-)

Tuesday 18 March 2014

Fabric to Dye For

Sunday was another "play day", dyeing and painting small pieces of fabric.  Most of these are done just to play with colors and techniques, so I don't have a particular project in mind for them.

On the left of this photo is a lavender commercial fabric that I overpainted using a gelatin monoprinting plate and freezer paper shapes as a resist.  For more information about gelatin monoprinting, check out this YouTube video:
https://www.youtube.com/watch?v=dvr6YqyyfUY

The fabrics on the right started out as unbleached muslin.  I had previously dyed them, but they didn't have enough color, so I overpainted them with the same gelatin plate technique.  The paints in all three of these are Pebeo Setacolor Transparent paints.
The next two fabrics don't really thrill me yet, but could work if I add more layers of paint or dye, or as base fabrics with embellishments on top (buttons, beads, couched threads).  I'll keep these as future possibilities.
There were a few other fabrics which were "ugly doggies".  If you'd like to see them.....oops, the garbage truck just left, never mind.

My prize piece of dyed and painted fabric from today started life as a quilted cotton window valance. I forgot to take a picture of it before I started, but you can see it in the left hand side of this photo.  It was quilted ivory cotton with some subtle flower embroidery, and a line of green piping.  My first plan was to use it as a curtain on one of my work tables, to hide the storage underneath.  But it didn't fit, so then I thought this fabric would make a great tote bag.  It just needed a little color.
 

I started by dyeing the piece a mottled yellow color.  I knew that this thing would soak up a lot of paint if it was just painted, and that it would end up stiff and crunchy.  Paint sits on the surface of fabric, dye bonds to the fibers.  After dyeing, I add some big dots of Distress Stains, and stamped on shapes with Setacolor Transparent paint.


Now this piece is looking better.  Some ivory is still showing, but there's lemon yellow, peaches, and pinks.  But what else could I add?


I draped a piece of red crinoline netting over the left side of the piece so show how that could add some richness to the color.  It's sparkly netting too, and hey, sparkles are never a bad idea!

This piece is not done yet.  I find this kind of layering works best if I add a layer or two, then leave the piece somewhere visible for a few days or weeks.  The ideas flow as I add and look, think, then add some more.

One last photo - the original fabric was purchased for an ocean-themed crazy quilt I've been working on for 5 years.  This is known as a WISP, work in slow progress.  I loved the fabric, but the orange color was too overpowering.  The quilt blocks (diamonds) are all in greens, blues and purples, so orange just pops out and screams LOOK AT ME!  How rude, you orange fabric :-)  Here's what happens when you overdye with splotches of Chipped Sapphire Distress Stain and diluted Turquoise Setacolor paint:
The overdyed fabric is much easier to work with now, with the orange under control.
 
Dyeing and painting fabric was a relaxing way to spend an afternoon, with no deadlines and no expectations.

Friday 14 March 2014

Earring Holder

Looking at Pinterest this week, I found a tutorial for an earring holder.  It looked quick and easy, so I gave it a try.

Here's the link to the excellent tutorial -

http://www.delightfullydiy.com/2013/03/quick-earring-storage.html

I bought a gift box at the Dollar store for $3, and I only used the lid for this project.  The bottom of the box will be another handy storage container in my studio.  I used 6 pencils I had on hand, and bought 6 pieces of craft felt for $3.  So, for $6, I had the materials for this project and a bit more.

And here's the finished earring holder.  My earring collection is not huge (I have to wear silver or gold), but it's still easier to find what I need when it's not all jumbled in a dish.  I like the way this looks on my dresser!


Wednesday 12 March 2014

Well, Hello Doily!

I popped into my local thrift store today and found a bag of doilies for $3.  I wasn't sure how many were in there, or what condition they were in, but I can use even damaged textiles in my work.  So I bought the bag.

Imagine my excitement to find 12 doilies, in perfect condition! 
At first I felt a little sad that each piece of handwork, lovingly made by an unknown woman, had sold for 25 cents each.  But I feel happy again knowing that I am not merely collecting these to sit in a drawer.  They will be added to
crazy quilt blocks, jean jackets and other wearable art.

Don't forget to enter my giveaway, to be drawn March 20.  Leave a comment on the March 7th post to enter!

Monday 10 March 2014

St Paddy's Day Quick Project

This weekend was the time for a quick and fun project - a pin for St. Patrick's Day!

This was my inspiration - a pin I made for Canada Day a couple of years ago.  This pin is waaaaay too big, almost 5-1/2" across, so I took it apart and made a smaller version.


Using the same technique, I made a shamrock pin for St. Paddy's Day.  I could have looked on Google images for "line drawing shamrock" to get the shape and size I wanted for a pattern.  But then I found some shamrock stickers at the dollar store, which I used as the front of the pin and for a pattern for the stabilizer and backing.  Here are the supplies:

 
Sorry about the glare on the package of stickers....  From the left, a package of sparkly fun foam stickers from the dollar store; a bunch of buttons; several kinds of beads/sequins; black Peltex, a very firm stabilizer; a sew-on brooch back; green wool felt; embroidery thread.  IMNTBHO (In my never-to-be-humble opinion), wool felt is the only kind of felt to use.  So nice to work with, such beautiful rich colors, and much better coverage than thin and scratchy "craft felt".  I buy wool felt squares at www.joggles.com , which is also an excellent source for beads, threads, and other goodies.  Joggles has inexpensive and fast shipping, high-quality products, and very helpful people.  Be sure to check out their online tutorials, for dozens of techniques and projects.
 
To make the pin, I put a sticker on the Peltex, using it as a pattern.  Then I trimmed down the stabilizer, so the black wouldn't show through to the front of the pin.  You can see that the glitter from the sticker migrated to the backing; and yes; it was all over my work surface, hands, clothes...
 
Then keeping the Peltex and the sticker as one unit, I stitched on buttons, applying the biggest ones first and filling in with smaller buttons and finally beads.  Buttons with shanks are good to fill in small gaps, as only the shank needs to fit in the gap, and the button face sits on top. Because my base is a sparkly sticker, I wasn't too concerned about filling in every millimeter of the pin face.  With the Peltex adding stiffness and supporting the weight, you could really encrust these pins with multiple layers of embellishments. 
 
Here's the almost-finished pin, just waiting to be assembled.
I used another sticker as a pattern to carefully and exactly cut out green felt for the back.  I sewed the bar pin on the felt backing, and glued the units wrong sides together. I used Aleene's Tacky glue, applied lightly with a paintbrush, and used clothespins to clamp it until it dried.  This was a fun afternoon project, and I wore the pin on a blazer to church yesterday.  It made a couple of people smile, but especially me!


Friday 7 March 2014

It's Time For A Giveaway!

As I continue unpacking boxes and setting up my Sewing Room, I have found a few things that I just don't know what to do with. This piece is from a Crazy Quilt Round Robin I participated in two years ago. I did the fabric piecing and some of the embellishments, and then three other ladies in the USA took turns working on it. It measures 44 cm wide x 33cm high (17 x 13 inches).


Here are some close ups to show the embroidery buttons, beads and other bits of happiness. 


I could have framed this as a piece of art, stitched it to the front of a tote bag, made it into a cushion....but I haven't so far. And I know my UFO (unfinished objects) pile is much too large. So I'm going to give away this piece of pink lusciousness to one of my readers!

I'll make a random drawing of any entries sent it by March 20. To enter just leave your name in the comments below. I'll use a highly technical method to determine the winner (involving slips of paper and a hat), and then I'll pop this baby in the mail!  

Thursday 6 March 2014

Jean Jacket - The Big Reveal!

It's done, it's done!  I am so excited about this jacket, I just wish the weather would warm up enough that I only needed a jean jacket to go outside.  This past weekend was "fur hat, heavy parka and thick gloves" weather.  No wonder this jacket is now in spring colors - I am SO ready for winter to be over!!  But I digress.....on to the jacket...

 Here's the peacock in all his glory.  Because the embellishments on the front were in peaches and pinks, and the peacock is more ivory colored, I wanted to tie together the front and back a little more gracefully.  So I used a button trail, which adds lighter colors to the front, and more of the pinks to the back.

 This picture is sideways, and I can't get it turned the right way up....sorry.  But this shows a close-up of the lace yoke and the front of the button trail.  This is the most accurate representation of the colors.

And, here's the finished jacket front -
I have so many more ideas for upcycled jean jackets, I think my next project will be a jacket for sale. I recently got a pretty jean jacket from a thrift store, much too small for me, but perfect to embellish and sell.

Tuesday 4 March 2014

Jean Jacket - Part 2

Part 2 of the jean jacket project -

I got this peacock doily at a thrift store (Nu2U in Olds, Alberta - the most awesome thrift store ever!!)  It's a bit worn in places, which I plan to cover up with stitching, or buttons.  I put some small squares of Heat and Bond fusible on the doily (just the lower fabric part), then pinned it to the back of the jacket, before fusing it in place.  I'll use perle cotton to stitch the lace portion to the jacket.

Here is the doily, stitched on and embellished with sequins and beads
 
I wanted lace trim at the cuffs and the front yoke, but didn't want it to be stark white.  So I used some Procion dye and had some fun.  My first attempt using the Baby Pink color was a failure...more like the color of a crushed strawberry, not the soft pink I was aiming for.  So I bleached back some of the color.  Because I swished the lace very quickly in a sink of hot, soapy bleach water, the color lifted in a mottled pattern which I really like.  Then after washing and rinsing well, I overdyed the lace with very dilute fuschia Procion dye. Here's how the pieces turned out.


Pale pinks and peaches - aren't these fun?!

And here are the lace cuffs added to the jacket:


Stay tuned for Part Three - the finished jacket! 

Sunday 2 March 2014

Jean Jacket - Part One

I have a zip-up jean jacket that I want to embellish. I started by hanging the jacket in my sewing room.  It helps to look at a garment for a few days while I'm trying to figure out the design.  


I searched "jean jacket upcycle" on Pinterest to get some inspiration. 
 
I love the lace panel on this, and the way the seamstress cut away the denim underneath it.
This one is similar, with the addition of lace at the front yoke.
Fuschia crushed velvet - so luscious.
Love the lace trim at the bottom, and the layers of several kinds of lace.
This is not the direction I want to go for this project, but I love, love, love the huge double ruffle on this!
 

Okay, this is a journal cover, but I love the layers of lace and ribbon and embellishments. 

Time to rummage through my trims and beads, and to audition them on my jacket.